
Configure notification destinations for alerts.
Overview
Use the Notification destinations page to create, view, and manage notification destinations for alerts.
The Notification destinations page lists configured notification destinations, the alerts using them, and other details. To open the page, select Alerts in Cloud Observability’s sidebar and select the Notification destinations tab.
Customize the page’s table and columns with Reset layout. Select the Reset layout button next to the search bar to hide and show columns, reorder columns, and restore the table’s defaults.
Cloud Observability has built-in support for these notification destinations:
You can also use Webhooks to send alerts to different apps. Or you can create and manage notification destinations with Cloud Observability’s Public API.
Create destinations
This page shows how to configure notification destinations from Cloud Observability’s Notification destinations tab.
You can also configure notification destinations from the alert configuration page:
Under Notification rules, select the relevant destination type and select Search for a destination name > + Create destination.
ServiceNow
Centralize and manage your alerts with the ServiceNow Event Management application.
To complete the steps below, you need your ServiceNow URL and basic authentication credentials.
To create a ServiceNow destination:
- In Cloud Observability, select Alerts > Notification destinations.
- Next, select Create destination > ServiceNow.
- Fill out the form in the dialog:
- Name - The notification destination name you’ll see in Cloud Observability.
- URL - The URL for your ServiceNow instance.
- Username - Your ServiceNow username.
- Password - Your ServiceNow password.
- Select Save to activate the notification destination and return to the Alerts page. Cloud Observability displays <Name> destination saved successfully.
To verify your ServiceNow notification destination, test it in Cloud Observability. Next, visit Add CIs to alerts to further integrate alerts with the ServiceNow Event Management application, helping you resolve issues faster.
PagerDuty
PagerDuty alerts create a new incident in PagerDuty, and the resolution of the alert in Cloud Observability resolves the PagerDuty incident.
To create a PagerDuty destination:
-
From the navigation bar, select Alerts.
The Alerts view shows a list of all current alerts. -
Select the Notification destinations tab, select Create destination, and choose PagerDuty.
You’re redirected to PagerDuty. PagerDuty asks you to authorize Cloud Observability to trigger, acknowledge, and resolve incidents.
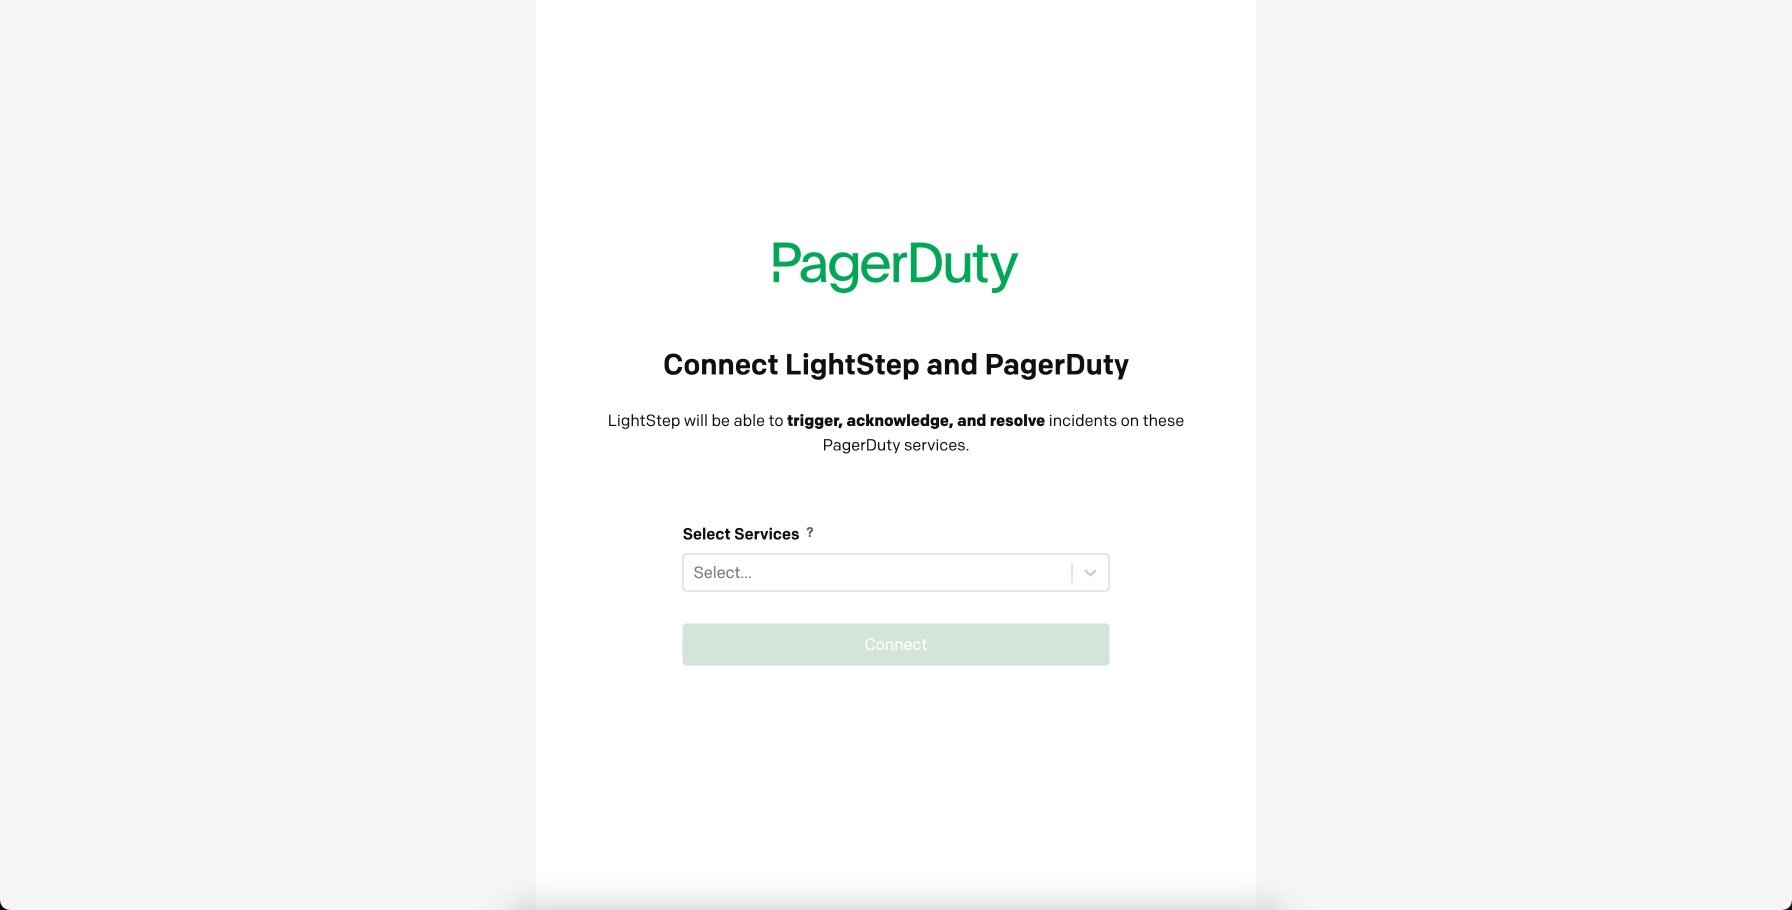
-
Enter your credentials and select Authorize Integration. Select an existing service with a Cloud Observability integration or create a new PagerDuty service with an integration. Follow the prompts to configure PagerDuty.
Once configured in PagerDuty, the PagerDuty service is listed as a destination in Cloud Observability.
You can test the destination by sending a test alert.
Slack
When you define Slack as a destination, the alert is sent to a specific channel or person in a Slack workspace.
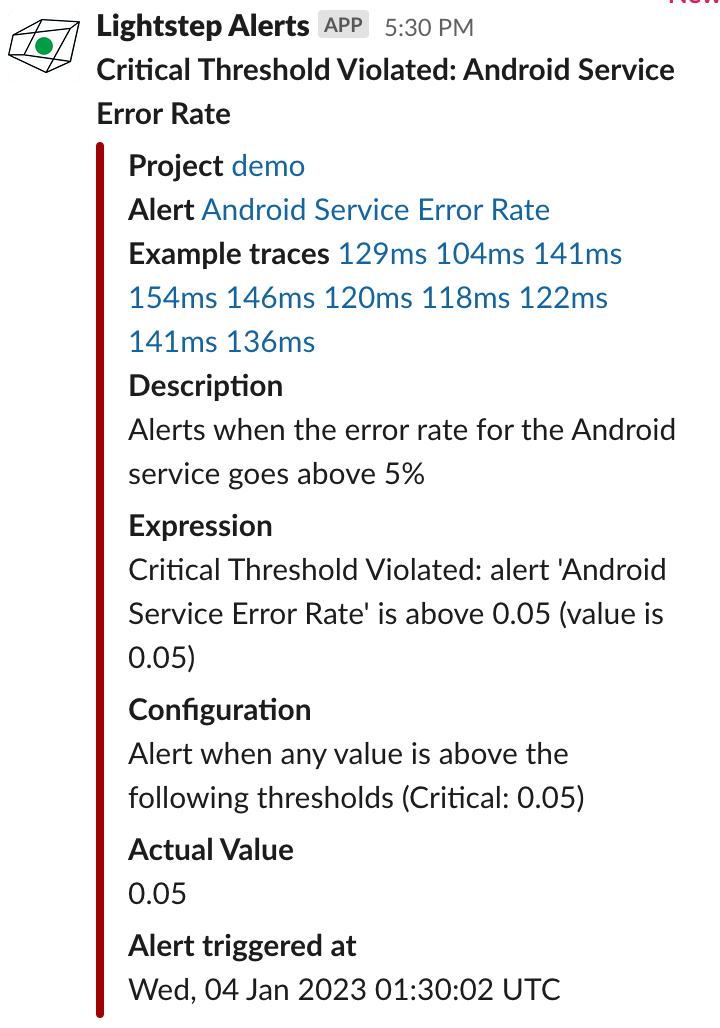
The Slack message shows information about the alert with links back into Cloud Observability to begin your investigation. Alerts when the threshold is violated and notification resolutions are sent to the Slack channel.
You can also customize the Slack payload using the webhook template.
You must have Admin privileges for your Slack workspace to create a Slack destination.
To create a Slack notification destination:
-
From the navigation bar, select Alerts.
The Alerts view shows a list of all current alerts. -
Select the Notification destinations tab, select Create a destination, and choose Slack.
You’re redirected to Slack. Slack asks you to sign into the workspace you want to post the alert to. -
Enter your workspace name and select Continue.
An authorization page displays asking to authorize Cloud Observability to post to your Slack Workspace.
-
Select the channel that should receive the alert and select Install.
The channel is added as a notification destination. You can test that your destination is correctly configured by sending a test alert.
Slack workspace integrations
If you are using the Public API to create a Slack notification destination, you must first activate the Slack workspace integration. This integration grants permissions for all channels in your Slack workspace.
To integrate your Slack workspace for API creation:
- In Cloud Observability, in the left-hand navigation bar, select Account Management and choose Slack integration.
- Scroll to the Slack integration table. In the Send alerts and warnings to Slack, select the Enable Slack button.
Be sure to select the first integration in the table. The second integration allows you to display previews when sharing Cloud Observability links in Slack.
To remove the integration, select the Revoke button.
BigPanda
Alerts with a BigPanda destination result in a new incident in BigPanda. When the alert is resolved, the incident is moved to the Resolved folder in BigPanda.
To create a BigPanda destination, you’ll need a BigPanda Bearer token and App key, generated from the Integrations tab in BigPanda.
To generate the BigPanda App key and Bearer token:
-
In BigPanda, select the Integrations tab and select New Integration.
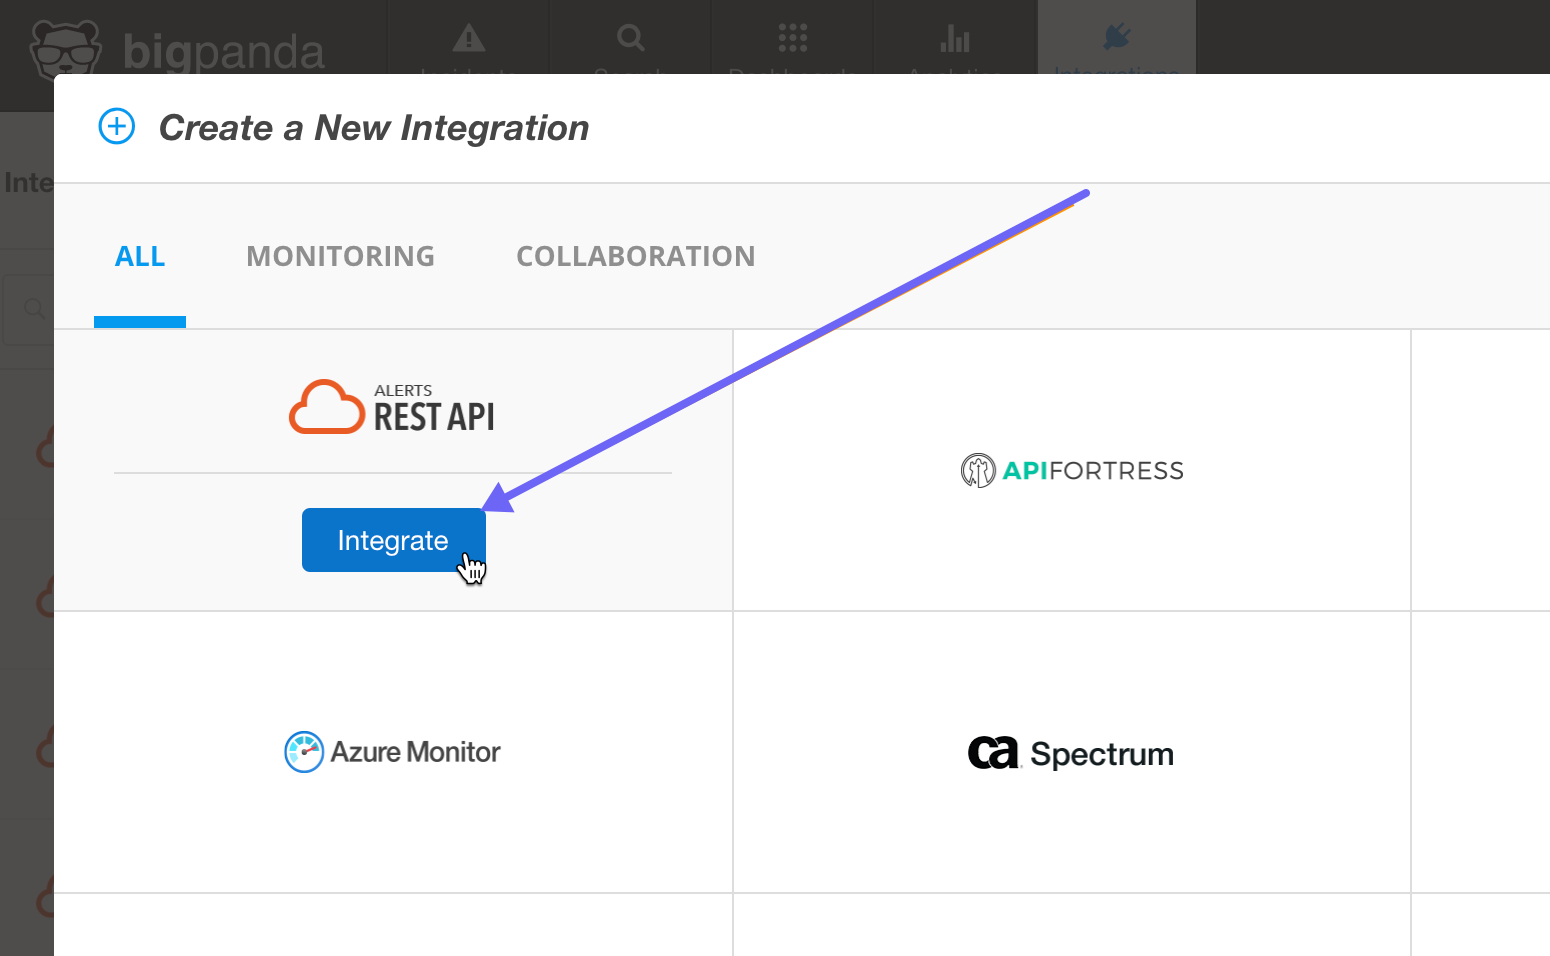
-
On the Create a New Integration page, choose REST API.
-
For Step 1, enter a name for the integration and select Generate App Key.
Your App key and Bearer token are generated. You’ll need these to configure the destination in Cloud Observability. 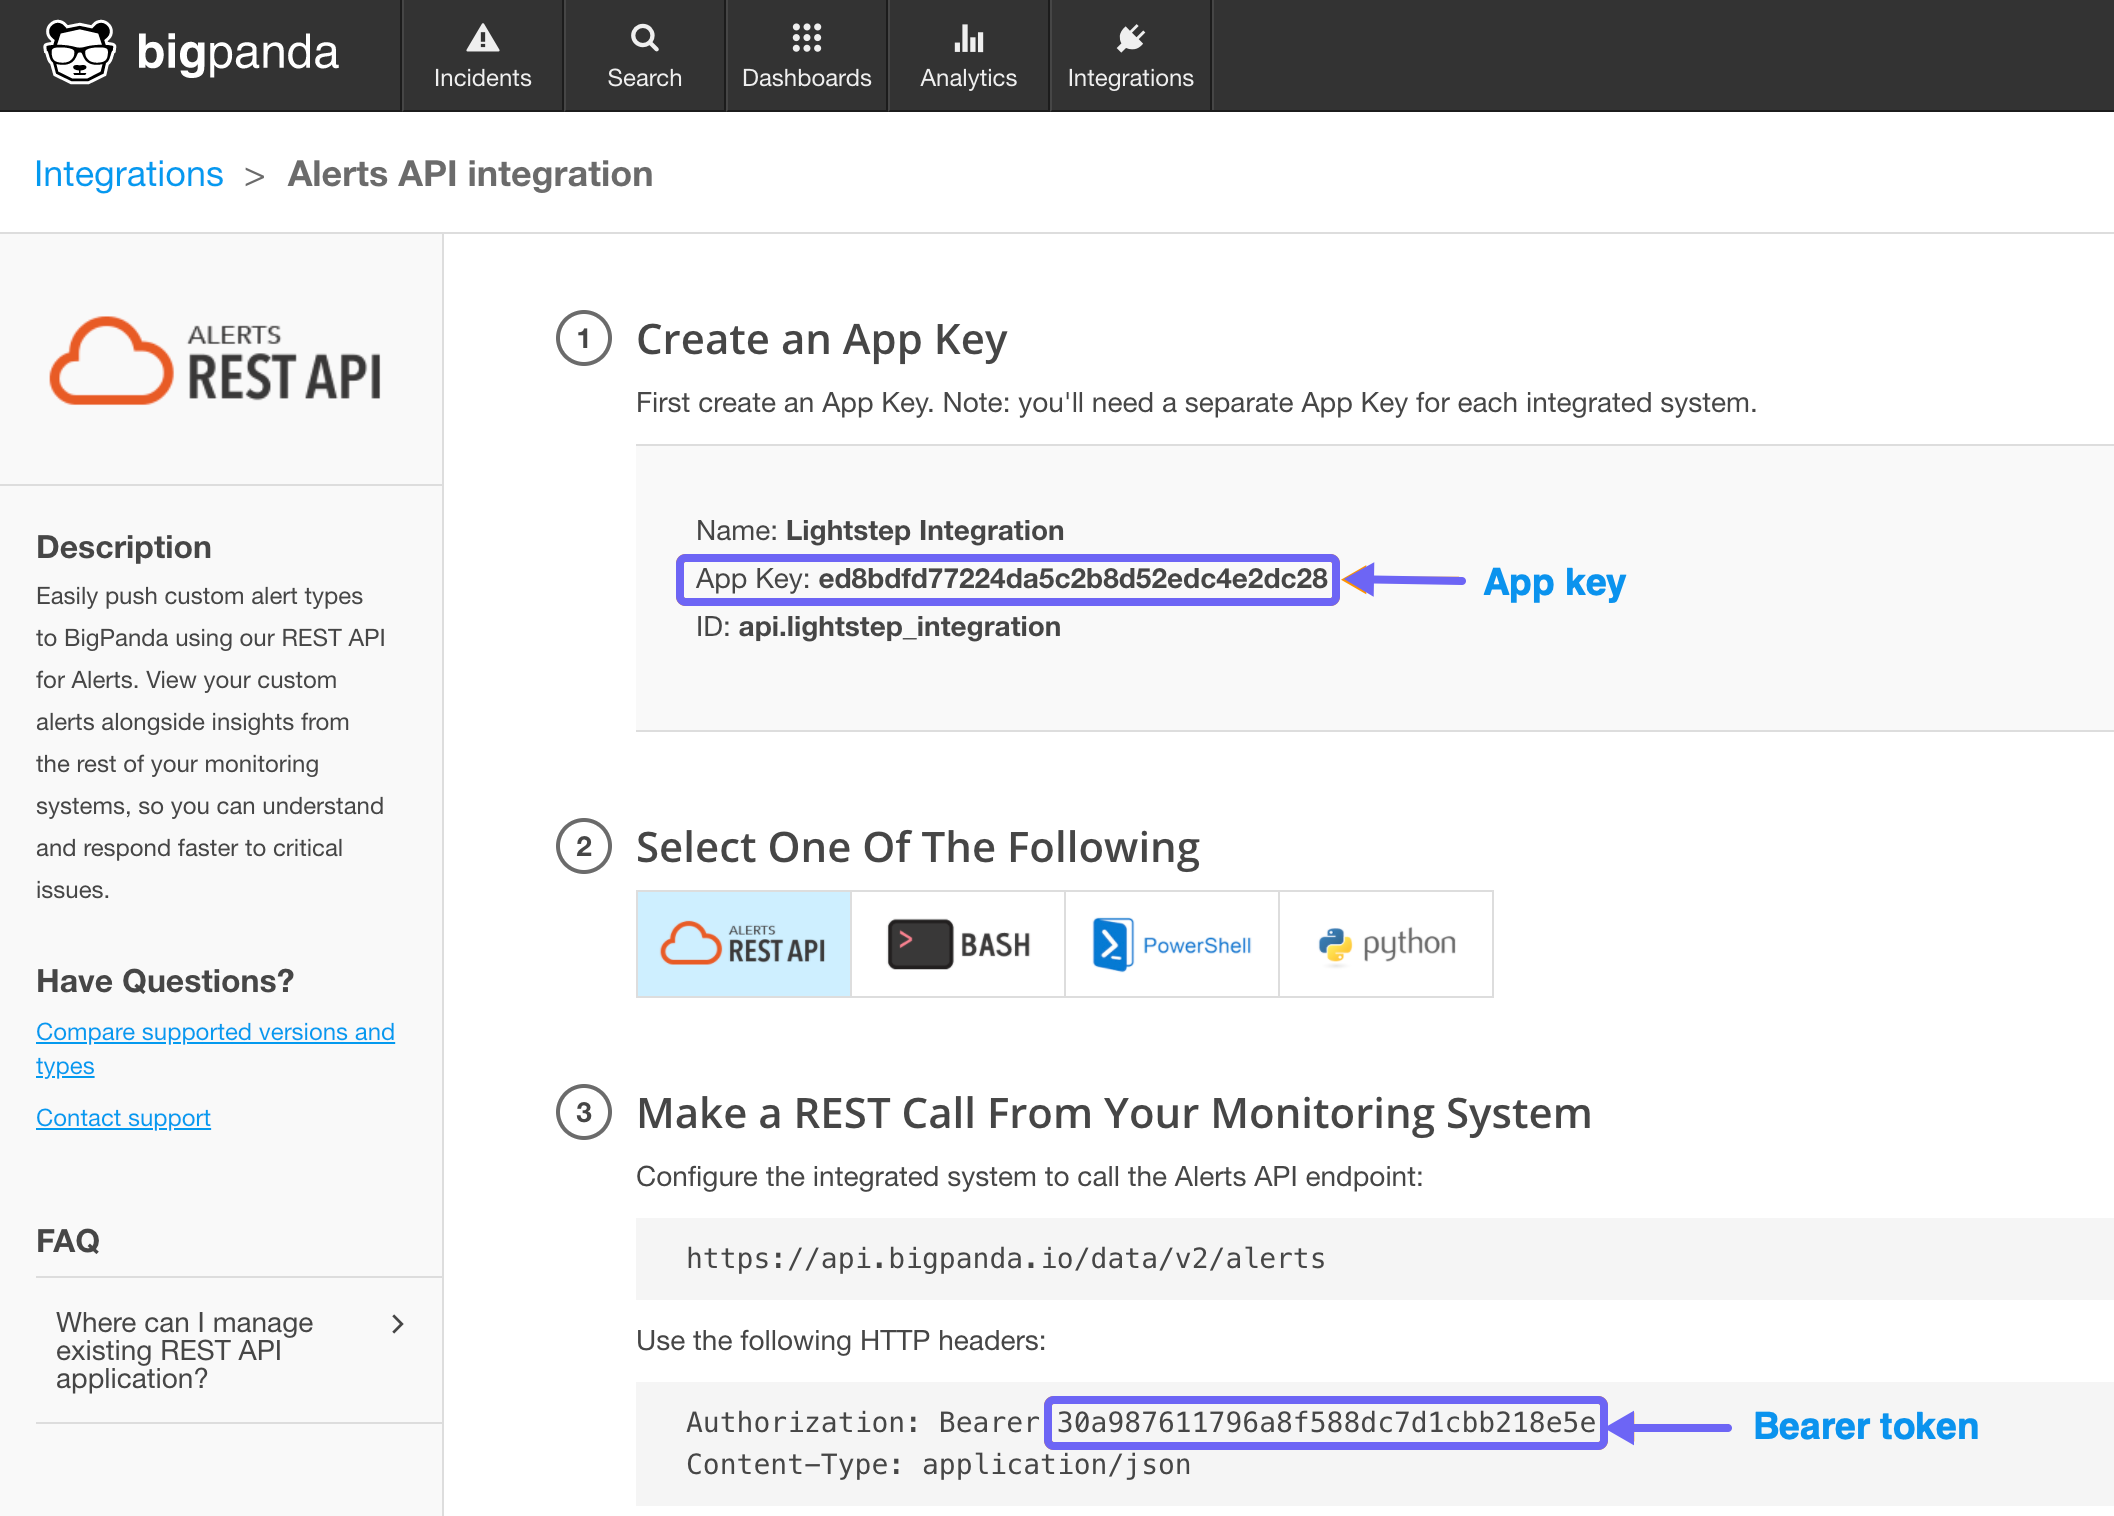
To create a BigPanda destination:
-
In Cloud Observability, from the navigation bar, select Alerts.
The Alerts view shows a list of all current alerts. -
Select the Notification destinations tab, select Create a destination, and choose BigPanda.
-
Enter a name for the destination and paste in the Bearer token and App key. You can add optional header content if needed. Select Save.
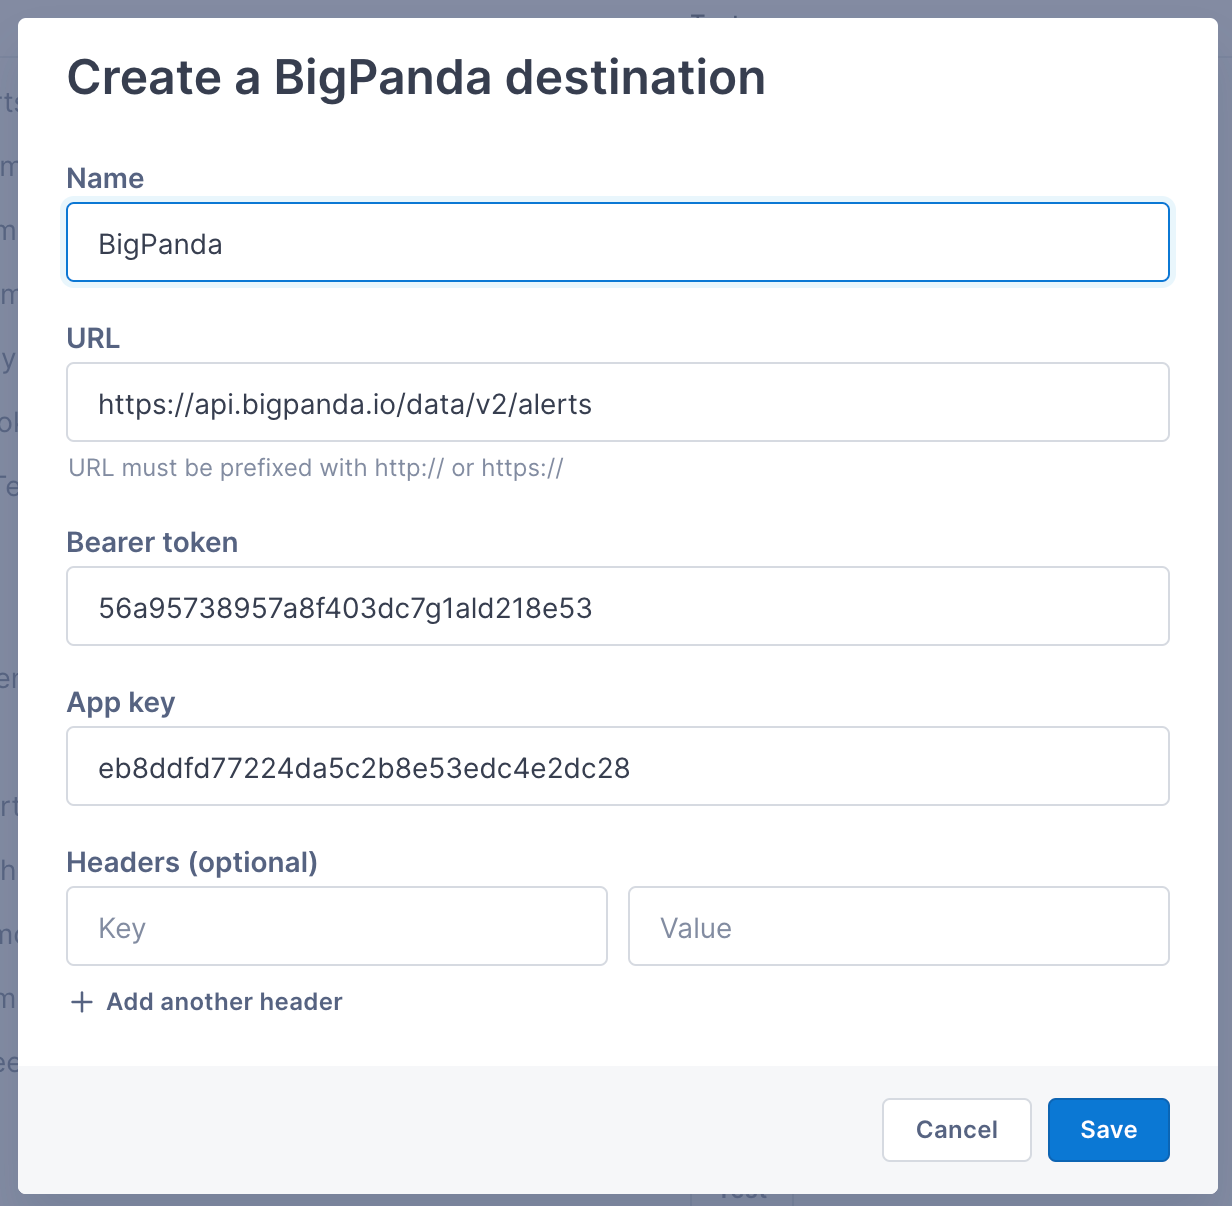
BigPanda is listed as a destination in Cloud Observability.
You can test the destination by sending a test alert.
Monitor and test destinations
Track destination health
Find and repair failing notification destinations.
To track notification destination health in Cloud Observability, select Alerts > Notification destinations. The Destination response column shows the latest response from your notification destination.
Select the response to open the View destination panel and learn more:
- Details
- Type, Name, and Created on - Notification destination details.
- Alerts configured – The number of alerts using the notification destination.
- Last attempt to notify - The latest response from the notification destination. And the time Cloud Observability last tried to interact with the notification destination.
-
Alerts configured
The list of alerts using the notification destination. Select an alert to view more information about the alert.
-
Notification history
The list of responses from the notification destination. Cloud Observability shows up to 1,000 responses in the past 90 days. Select an alert to view more information about the alert.
Test destinations
Send test messages to your notification destinations:
- In Cloud Observability, select Alerts > Notification destinations.
- In the table, find your notification destination and select Send test.
Cloud Observability sends a LightStep Test Alert to the notification destination.
Delete destinations
Delete unused or unwanted notification destinations:
- In Cloud Observability, select Alerts > Notification destinations.
- In the table, find your notification destination and select ⋮ > Delete.
- In the Delete destination dialog, select Delete <name>.
Cloud Observability deletes your notification destination and returns to the Notification destinations tab.
See also
Create webhook notification destinations
Updated Jun 5, 2024