
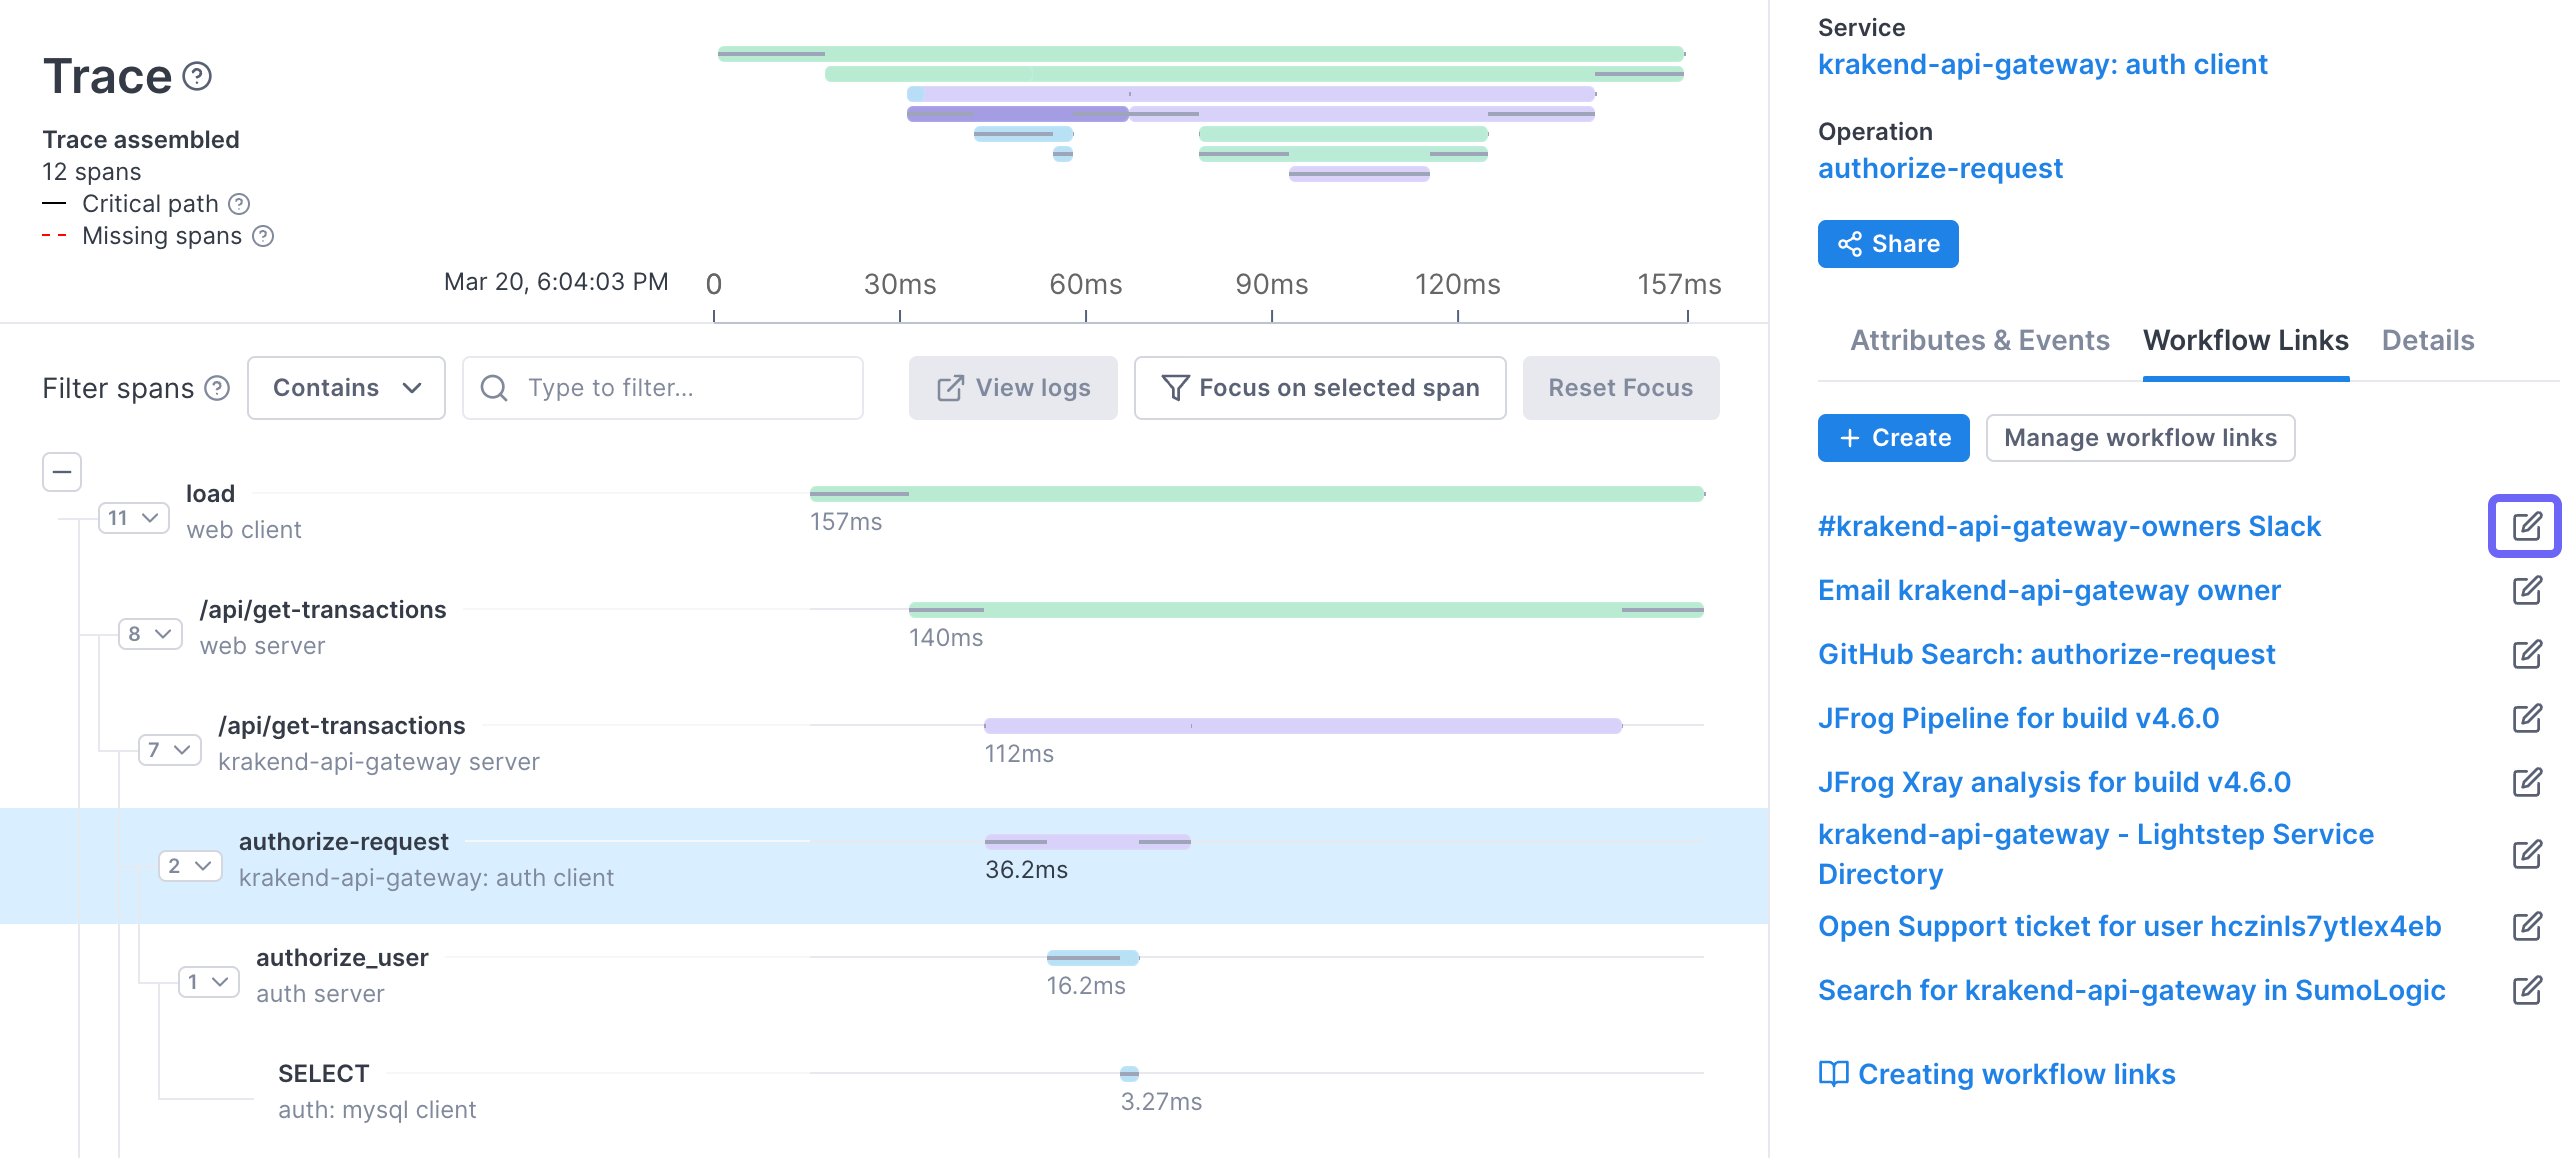
You can create and edit Workflow Links from either the Trace View page or Settings.
Here’s some additional content: Using Variables and Workflow Links Cookbook
Creating and editing links from the Trace View page allows you to experiment with link definitions on real span data and is the recommended approach. 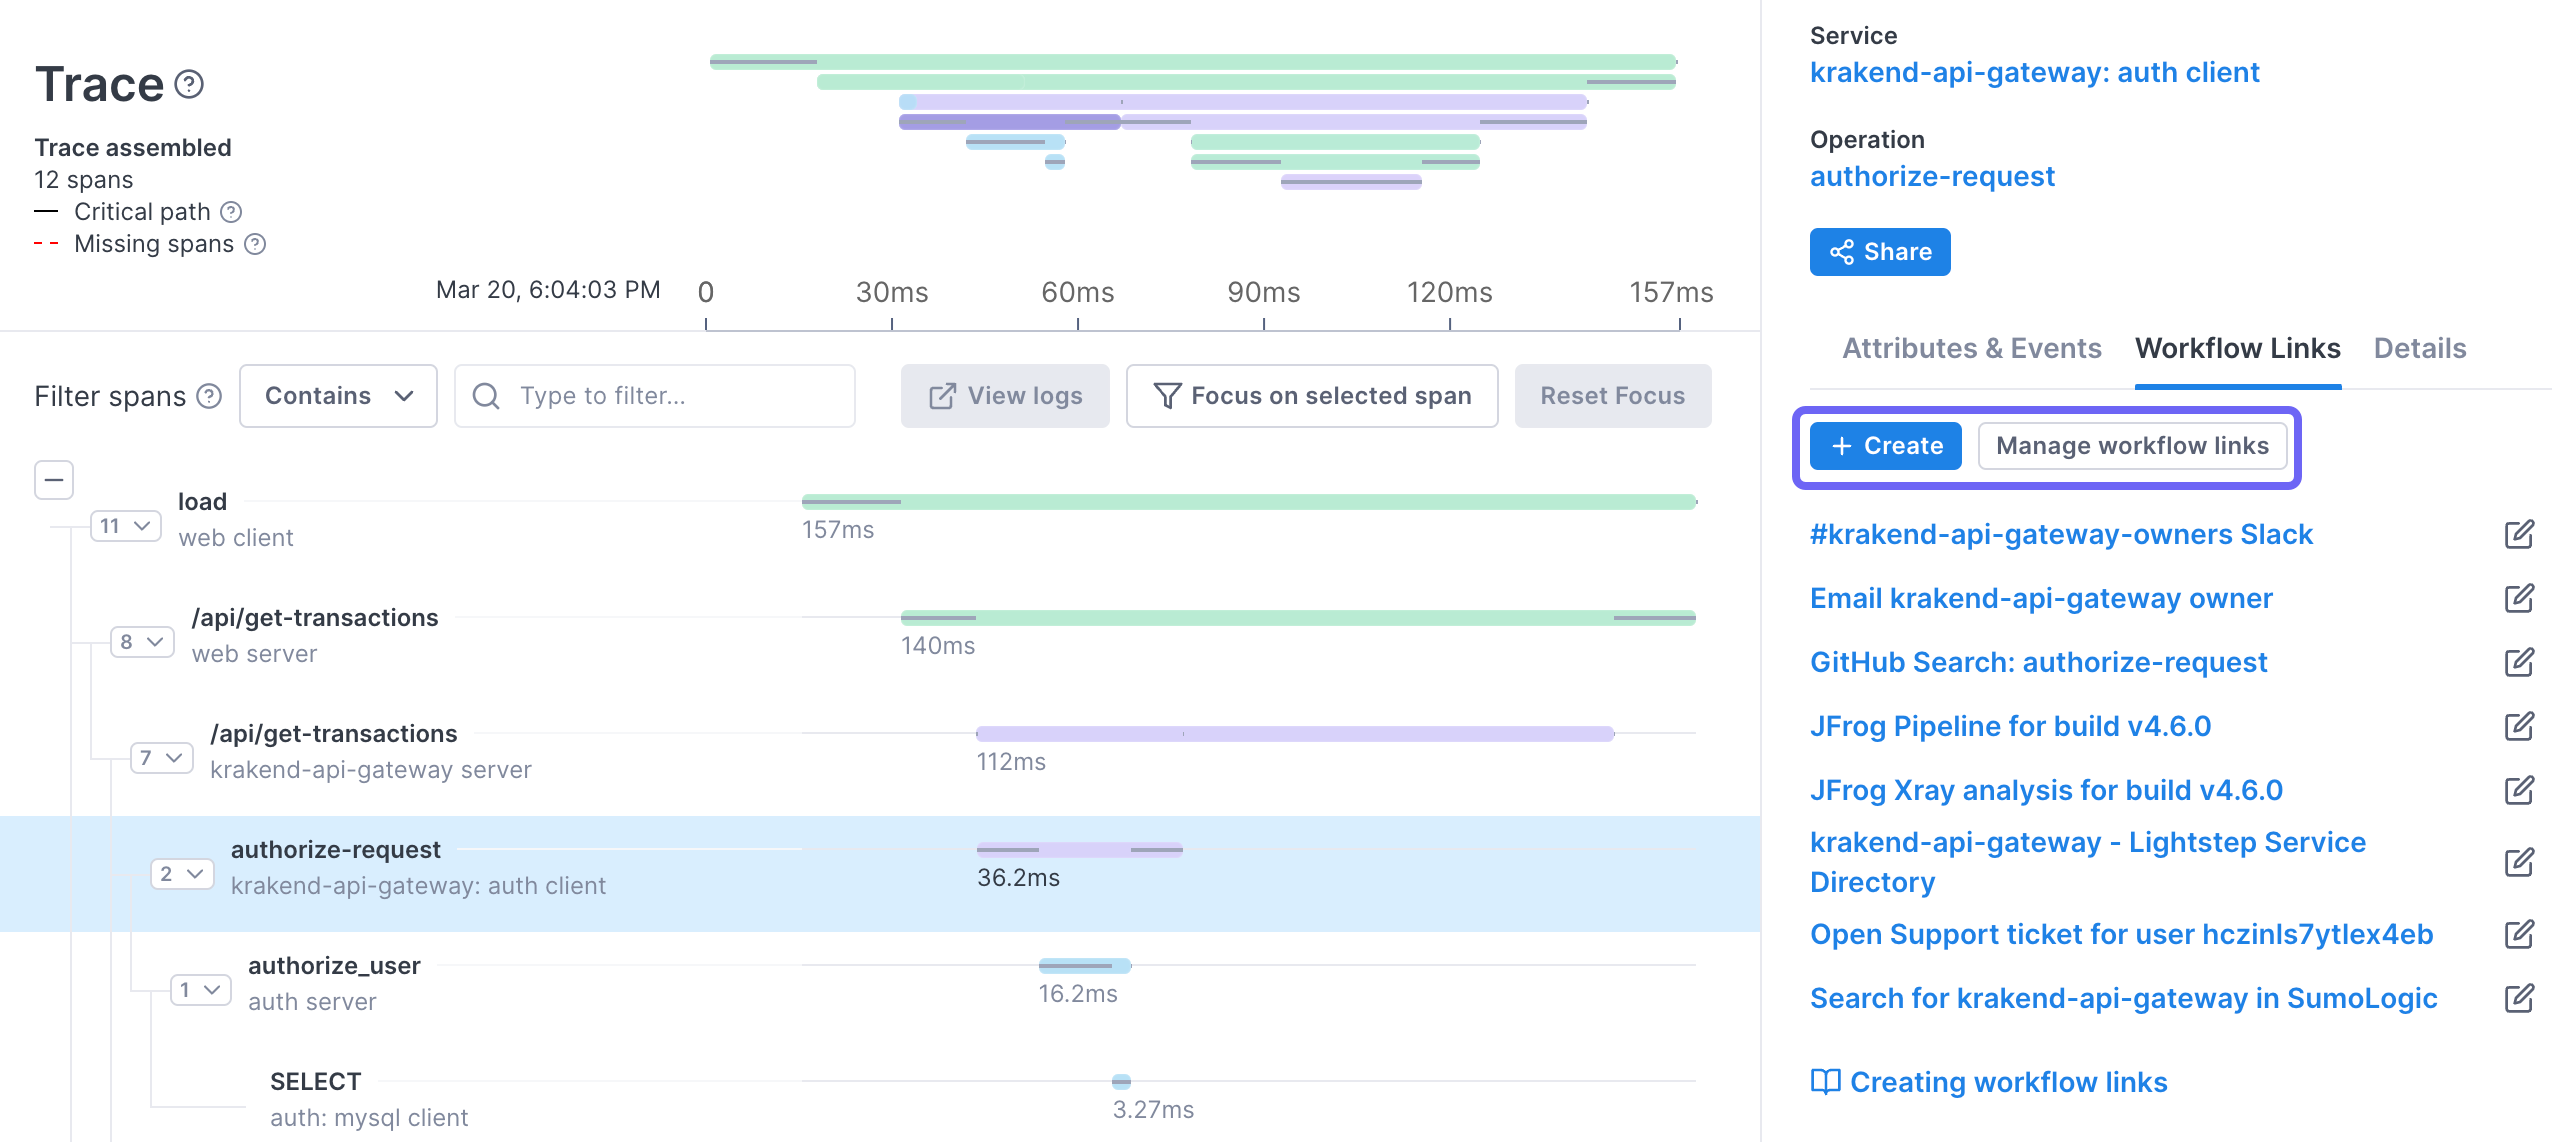
In Settings, you can view all your Workflow Links in one place. You can create, copy, edit, and delete links on the Workflow links page. 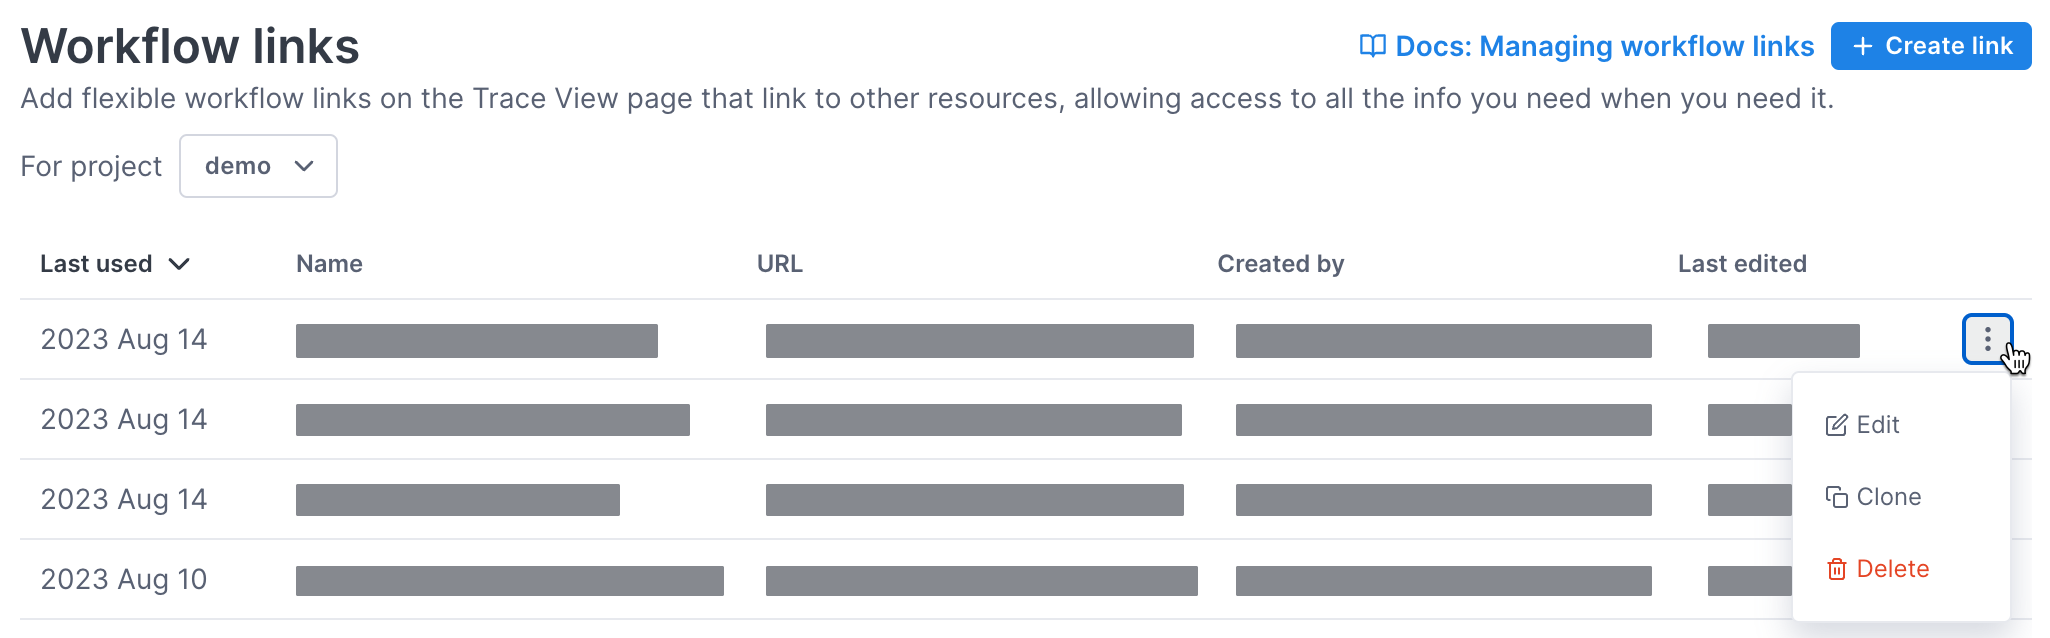
Workflow Links are project-specific. If you have more than one project in Cloud Observability, you need to create separate links for each.
Create Workflow Links
Any user with Organization Admin permissions can create, edit, and delete links.
To create a Workflow Link:
-
On the Trace View page, click the Workflow Links tab and click Create.
OR Click Settings > Workflow links, and then click Create link. You can use one of the pre-built templates or you can create your own custom link.
The templates are taken directly from the Workflow Links Cookbook and you can find even more examples there.
-
To use a template, select the template from Step 1 in the dialog.
Cloud Observability populates the fields with content from the template. You need to replace certain variables with your own. Click into an existing variable and click + Variable to choose one. The dialog shows you what the current value of the variable is for the selected span.
Read more about the template in the Workflow Links Cookbook to understand what to change.
When creating the link from the Trace View page, Cloud Observability dynamically generates the link below the URL field so that you can test it. It also generates the link text below the name field, where you can test it.
If the link will not display for the span currently selected on the page, a warning displays.
-
To create your own link, in the Create Link dialog, choose Custom for Step 1.
-
Enter a URL in the URL field. The URL can include variables you choose by clicking + Variable.
Cloud Observability escapes the HTML, so you don’t have to. As you type in a value, Cloud Observability displays the link, allowing you to test it immediately.
Variables can be from the list of Cloud Observability variables or your own span attributes.
- In the Rules box, enter JSON for your rule(s). Rules are written as a JSON object with attribute/value pairs. Values can be the following:
null: The link will be displayed when that attribute is present on the span, regardless of its value.- An array: The link will be displayed when the attribute has one of the listed values. Even if you want only a single value, you still need to use array syntax.
If you want a link to always display, no matter what, set the rule to {“$service”: null}, as every span has a service associated with it.
Values in an array are evaluated with a logical
ORoperator. The values between each rule are evaluated with a logicalANDoperator.To help ensure you enter correct values, Cloud Observability displays a warning if the value you entered will not display for the span currently selected. This error only displays when creating links from the Trace View page, when you have a span selected.
Here’s an example of a rule that displays the link for every service, in any cluster, whose GCP Zone is
us-centrall-forus-east1.1 2 3 4 5
{ "$service": null, "MY_GCP_ZONE": ["us-central1-f", "us-east1"], "MY_GCP_CLUSTER": null, }
You can also use NOT (
!) in your rule. For example, if you do not want the above link to display for theapiservice, you might use this:1 2 3 4 5
{ "!$service”: ["api"], "MY_GCP_ZONE": ["us-central1-f", "us-east1"], "MY_GCP_CLUSTER": null }
-
Enter the text to display for the link in the Name field. Names can include variables (using mustache {{ }} syntax). The limit is 64 characters. As you enter a value, Cloud Observability shows how the link text will display. You can test the link by clicking it. Cloud Observability automatically encodes all URLs.
The
Name + URLcombination must be unique.You can only test your links when creating them from the Trace View page because Cloud Observability needs the context of the span to resolve variables that may be in the Name or URL.
-
-
Click Create Link. Your link now appears in the list of links in the Workflow links page and, when the rule validates to true, on the Trace View page.
If your link doesn’t display for a span, it’s likely because the span doesn’t contain the attributes in your rule, or Cloud Observability could not resolve the variables from the metadata in the span.
Manage Workflow Links
You can edit existing links from either the Trace View page or Settings. You can only copy and delete links from the Settings page. That page also shows when the link was last clicked, who it was created by, and when it was last edited.
Edit Workflow Links
-
From the Workflow Links area of the Trace View page, click the pencil icon for the link to edit.
OR
Click Settings > Workflow links, find the link to edit, then click the More Options (vertical ellipsis) button. Choose Edit to open the Edit Link dialog. -
Change any of the fields as needed. Remember that the
Name + URLcombination must remain unique for the project.
Clone Workflow Links
You can clone Workflow Links only from Settings.
-
Click Settings > Workflow links, find the link to clone, then click the More icon and choose Clone. The Clone Link dialog opens, populated with the name, URL, and rules from the source link.
-
You MUST change at least the Name or URL before saving the new link definition.
-
Click Create. The new link displays in the list of Workflow Links.
Delete Workflow Links
You can delete Workflow Links only from Settings.
-
Click Settings > Workflow links, find the link to edit, then click the More icon.
-
Choose Delete.
You can also create and manage links using the Cloud Observability public API.
See also
Create links to important information
Use variables in Workflow Links
Updated Nov 29, 2019